Returning to Scenery by Installing Tunnels
(NOTE: While there have been visible changes made to the railroad between
the two previous progress reports (08/19/2007
and 12/31/2008), I'm going to proceed with
posting new progress reports at this time. I may revisit the progress made
between those reports and post additional reports.)
While much of the work done on the Shenandoah Division in 2007 and 2008 was not visible
to the eye (see the 12/31/2008 Progress Report), I
have started to work on doing some rough scenery again. While I had started the
rough scenery work e at Pearson Curve (see the
08/19/2007 Progress Report) in the summer of 2007, I had delayed doing
additional scenery until I completed the installation of signals between MC
Cabin and the north end of Covington. I wanted to install the signals before
enclosing the benchwork with scenery as I prefer to work from above, rather than
under, the layout whenever possible. This decision proved to be correct as I
struggled with installing the signals at each end of New Castle and the south
end of Laurel--all three locations already had scenery since they were part of
the original layout.
With the signal installation complete at the end of September 2008, I began to
turn my attention to scenery. I wasn't really able to start working on scenery
again until early December as a result of travel plans and other time
commitments.
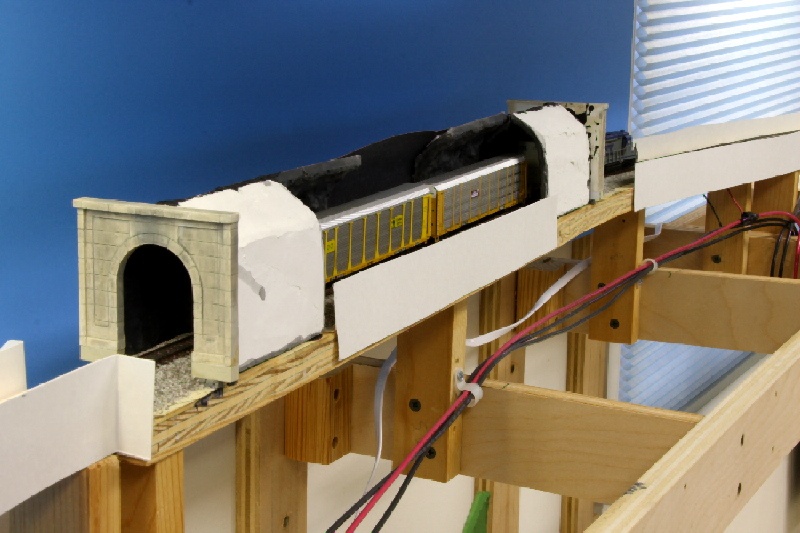
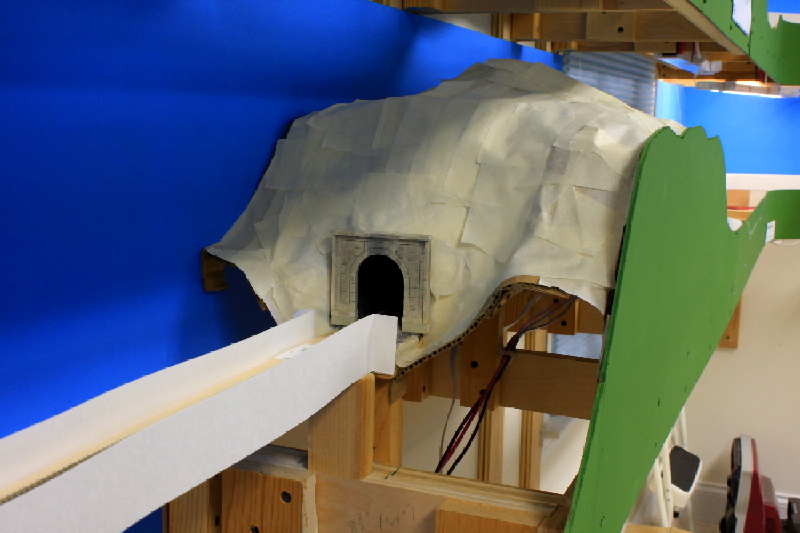
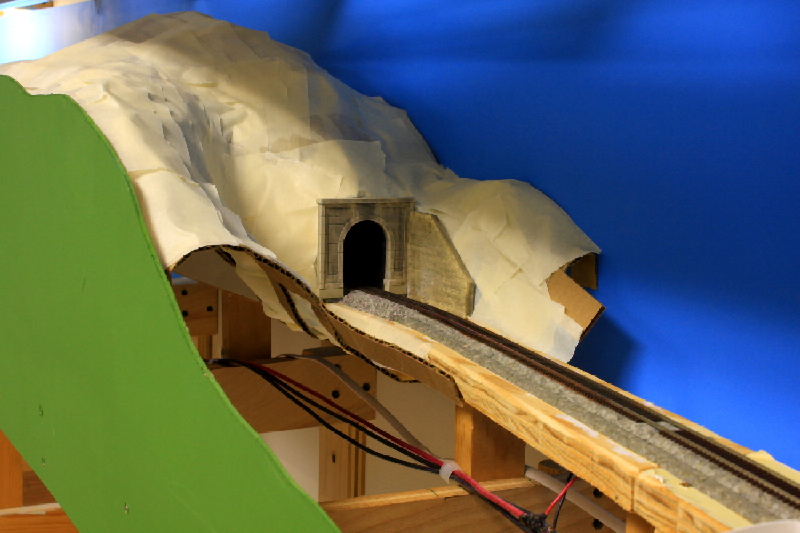
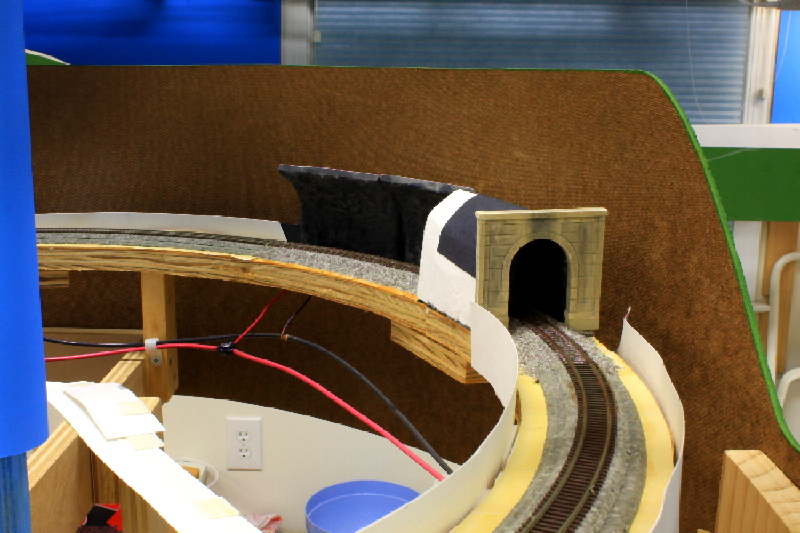
When it came time to start working on scenery again, I decided to start with
installing tunnel portals at various locations around the layout. When I install
portals, I also ballast into the portal and install a tunnel liner to represent
blasted rock.
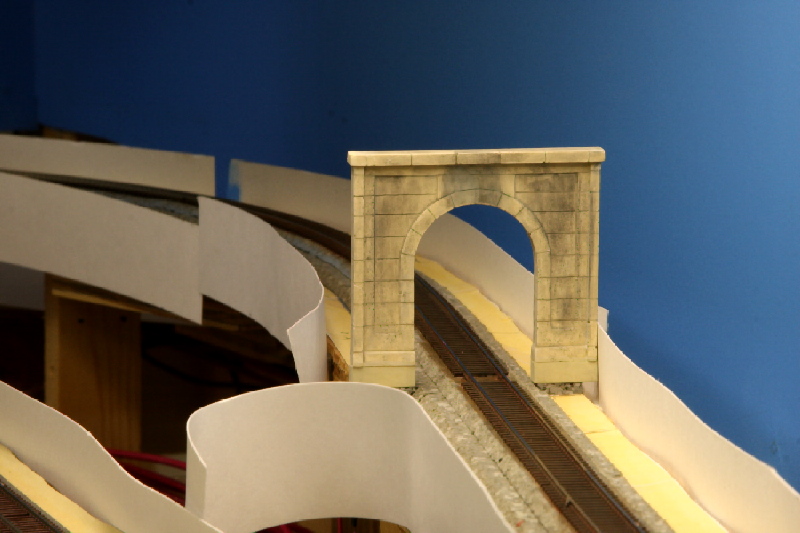
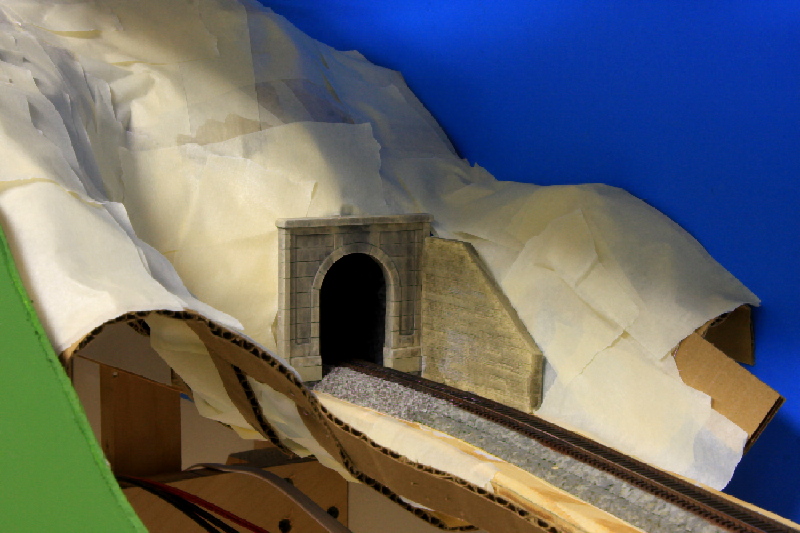
I am using Woodland Scenics concrete tunnel portals. I had used these portals on
V1 of the Shenandoah Division, so I wanted the tunnels on the new portions of
the layout to match. I raise these portals with some .250" x .250" strip styrene
in order to be able to clear double stacks. I used Woodland Scenics pigments
(Concrete, Slate Gray, Black) to color and weather the portals, and I used Polly
Scale Aged Concrete to paint the styrene extension. I installed pads of 1/8"
thick Vinylbed at the tunnel portal locations to get the bottom of the tunnel up
to to top of the subroadbed. I then glued the portal to the Vinylbed.
The next step at this point was to paint the rails and ties in the vicinity of
each tunnel portal. I used three separate washes of acrylic paints to color the
rail and ties. First, I applied a thick wash of Delta Ceramcoat Brown Iron Oxide
to the rails. I didn't worry about getting any of this on the ties as it will be
covered by the other steps--and, if it's not, then it highlights the tie plates
and spikes. Next, I applied a wash of Polly Scale Railroad Tie Brown to the
ties. Again, I didn't worry about getting it on the rail as it adds variety to
the color. Finally, I applied a thin wash of Polly Scale Grimy Black to blend
everything together. I applied this wash to both the rails and the ties, but I
did not try to get complete coverage with it.
After everything dried, I cleaned the paint off the tops of the rails.
Next, I ballasted the track inside the tunnel and for a few inches outside. I
normally like to apply ballast last as it allows me to hide the ragged edge of
the scenery, but I ballast tunnels first as they will be hard to access later.
:-) I use Woodland Scenics Fine Gray Blend ballast as my standard ballast, so I
applied some of this dry using a spoon. I then use a brush and my finger to
spread the ballast where I want it. I wet the ballast thoroughly with 70%
rubbing alcohol and then I apply a mix of white glue diluted 50/50 with water
(and a few drops of liquid dish detergent). After the ballast dries, I clean the
track and I remove any ballast particles glued to the rails or ties.
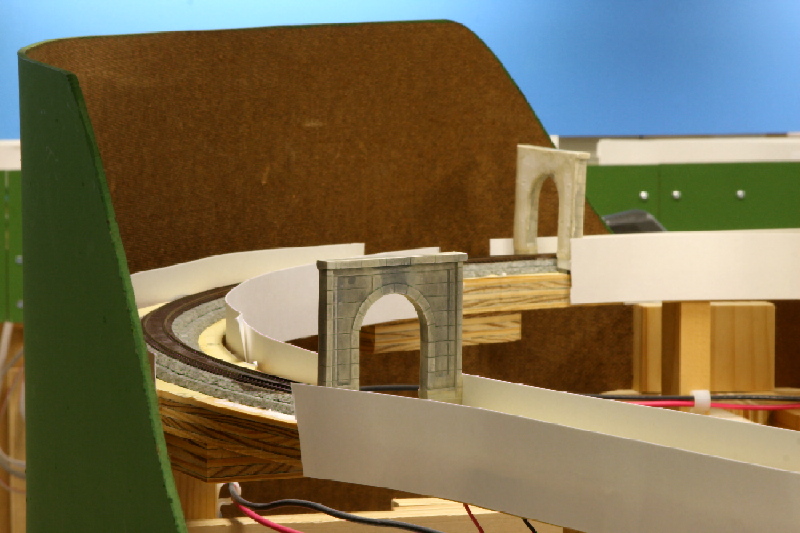
Once the ballast was done, I proceeded with install the tunnel liners which
represent the blasted rock interior of the tunnel. I had previously cast several
tunnel liners from plaster using the Woodland Scenics tunnel liner mold. I used
Woodland Scenics pigments (mostly Slate Gray and Black) to color these liners. I
install these liners using black latex caulk.
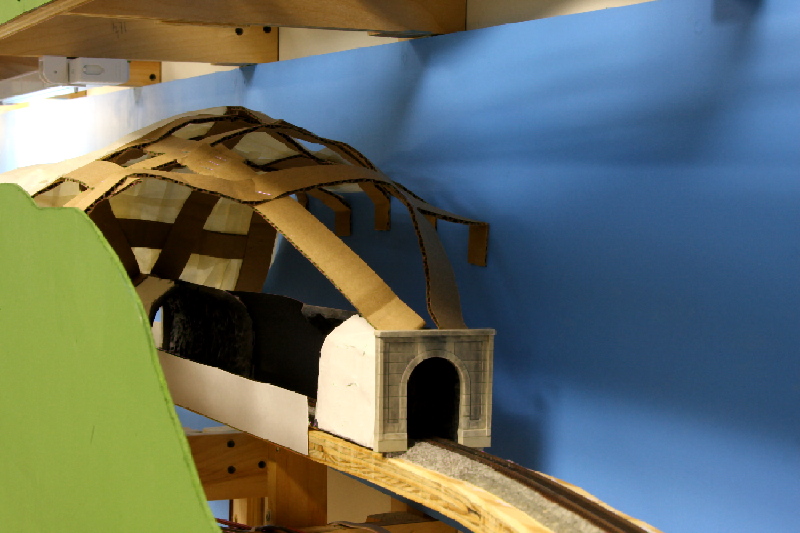
After the liners were installed, I used 1" wide cardboard strips to create the
mountain which the tunnel traverses. I use low temperature hot glue to attach
the strips to the fascia, subroadbed, and backdrop. I use a stapler when
attaching cardboard to cardboard. After I finished the cardboard web, I applied
pieces of 2" (really 1.88") masking tape to the web. The masking tape helps to
visualize the scenery and also helps minimize dripping when the plaster is
applied.
|